
What is a REST API?
The standard way to build a web API is to take a RESTful approach (referred to as a REST API).
REST APIs are resource-based interfaces. On the web, this means that data resources (usually formatted as JSON or XML) are represent ted by URIs (paths) accessed via HTTP.
CRUD actions (Create, Read, Update, and Delete) are performed on these resources using HTTP methods (referred to as verbs): POST, GET, PUT/PATCH, DELETE.
Every request made to a REST API is stateless. This means that the server handling the requests has no context between the different requests (each request is interpreted separately). Any context required to process the request must be supplied with the request itself (for example, an authorization token).
Good REST APIs maintain a unified interface. That is, the same form of a request made against a particular resource can reasonably be expected to act the same way against another resource (e.g., a request that modifies an attribute on a blog post resource is standardized to modify a similar attribute on another blog resource).
Another feature of a REST API is that the server responses are cacheable. This means that depending on the context returned with the request response by the server, you can cache the item. The server may return strict instructions about how long the resource can be cached. For example, it may direct you not to cache or provide the recommended length of time for caching before updating.
Setup
Let us start by creating a basic application.
First create a directory named myapp, change to it and run:
npm initThis will run through some basic steps of setting up the package.json file for npm.
Then install express as a dependency:
npm install express –saveIn the myapp directory, create a file named index.js and copy in the code below:
// import packages
const express = require('express');
// App
const app = express();
// Define port
const port = 3000;

app.listen(port, () => {
    console.log(`Example app listening at http://localhost:${port}`);
});
Let us try to run our application for the first time by calling the command below from the project root.
node index.jsIf your terminal output matches the following:
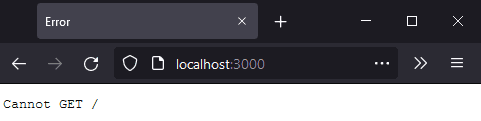
Example app listening at http://localhost:3000Try loading your app in your web browser via http://localhost:3000/ to see the output.
You should receive a message stating Cannot Get /.
In this tutorial, we will create a basic blog stored in a JSON file with the following fields:
- id - Number
- created_at - Date (ISO 8601)
- updated_at - Date (ISO 8601)
- title - String
- content - String
- tags - Array
In the root of the project, create the following folders and files:
└── data
    └──posts.json
└── helpers
    ├── helper.js
    └── middlewares.js
└── models
    └── post.model.js
└── routes
    ├── index.routes.js
    └── post.routes.js
Now let us set up the initial datasets that we will use for our APIs. In the data directory, open the posts.json file and add the following:
[
    {
        "id": 1,
        "title": "First post",
        "content": "Lorem Ipsum",
        "tags": ["tag1", "tag2", "tag3"],
        "createdAt": "Tue Aug 17 2021 13:54:08 GMT-0400 (EST)",
        "updatedAt": "Tue Aug 17 2021 13:54:08 GMT-0400 (EST)"
    },
    {
        "id": 2,
        "title": "Second post",
        "content": "Lorem Ipsum again",
        "tags": ["tag2", "tag4"],
        "createdAt": "Tue Aug 17 2021 13:54:08 GMT-0400 (EST)",
        "updatedAt": "Tue Aug 17 2021 13:54:08 GMT-0400 (EST)"
    }
]
Now we are ready to start writing our own APIs.
Routing
Express is great for constructing a REST API because it provides an easy interface to separate your resources by both type and action.
If you have previously built a web application using Express, you will find that the steps for building an API using the same framework are very similar.
Open the index.js file in your code editor.
This file is as simple as you can get when creating an Express application. We created an object for the application and made the application listen on port 3000:
const express = require('express');
const app = express();
const port = 3000;

app.listen(port, () => {
    console.log(`Example app listening at http://localhost:${port}`);
});
The concept of routes in Express is used to define the behavior of an application to run when a particular request is received.
A route in Express consists of three main parts:
- The HTTP method is bound to the request we want to capture.
app.get();
- The URI (or path) of the request we want to capture.
app.get('/');
- The handler function (which accepts a request and response object as arguments)
app.get('/', function(req, res) { });
Here is an example of processing a GET request on / (in other words: what happens when someone loads your app’s index into their browser):
const express = require('express');
const app = express();
const port = 3000;
// Our handler function is passed a request and response object
app.get('/', (req, res) => {
// We will send the request when we are done handling it
res.send('Hello World!');
});
app.listen(port, () => {
console.log(`Example app listening at http://localhost:${port}`);
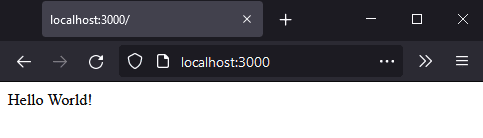
});After restarting our app and reloading http://localhost:3000, we get the message “Hello World!” instead of an error message.
Now we need to think about the functionality we want to provide our end users. If we allow them full CRUD access, we will need to create routes for each of these actions.
Helpers
Before we move on, let us prepare some methods that we will reuse in our handler functions.
In the helpers directory, open the helpers.js file and paste in the content below:
const fs = require('fs');
const path = require('path');

const getNewId = (array) => {
    if (array.length > 0) {
        return array[array.length - 1].id + 1;
    } else {
        return 1;
    }
};

const newDate = () => new Date().toString();

function checkDataArray(array, id) {
    return new Promise((resolve, reject) => {
        const row = array.find(r => r.id == id);
        if (!row) {
            reject({
                message: 'ID not found!',
                status: 404
            });
        }

        resolve(row);
    });
};

function writeJSONFile(filename, content) {
    fs.writeFileSync(path.resolve(__dirname, filename), JSON.stringify(content), 'utf8', (err) => {
        if (err) {
            console.log(err);
        }
    });
};

module.exports = {
    getNewId,
    newDate,
    checkDataArray,
    writeJSONFile
};
This provides us with four very useful functions:
- getNewId - Searches an array for the last Id and increments by 1 to return a new Id.
- newDate - Returns the date of your server in ISO 8601.
- checkDataArray - Uses the native JavaScript function find() to retrieve the object by the Id in function parameter and return a promise. This is used when we need to check if a row exists via the Id (Get One, Update and Delete).
- writeJSONFile - Write a new array in a JSON File.
Model
We also need to set up the methods that our handler functions will call to interact with the actual data file. For this we will use the helper functions we just created.
In the models directory, open the post.model.js file and paste the content below:
const filename = '../data/posts.json';
let posts = require(filename);
const helper = require('../helpers/helpers.js');

function getPosts() {
    return new Promise((resolve, reject) => {
        if (posts.length === 0) {
            reject({
                message: 'no posts available',
                status: 202
            });
        }

        resolve(posts);
    });
};

function getPost(id) {
    return new Promise((resolve, reject) => {
        helper.checkDataArray(posts, id)
        .then(post => resolve(post))
        .catch(err => reject(err));
    });
};

function insertPost(newPost) {
    return new Promise((resolve, reject) => {
        const id = { id: helper.getNewId(posts) };
        const date = {
            createdAt: helper.newDate(),
            updatedAt: helper.newDate()
        };
        newPost = { ...id, ...date, ...newPost };
        posts.push(newPost);
        helper.writeJSONFile(filename, posts);
        resolve(newPost);
   });
};

function updatePost(id, newPost) {
    return new Promise((resolve, reject) => {
        helper.checkDataArray(posts, id)
        .then(post => {
            const index = posts.findIndex(p => p.id == post.id);
            id = { id: post.id };
            const date = {
                createdAt: post.createdAt,
                updatedAt: helper.newDate()
            };
            posts[index] = { ...id, ...date, ...newPost };
            helper.writeJSONFile(filename, posts);
            resolve(posts[index]);
        })
        .catch(err => reject(err));
    });
};

function deletePost(id) {
    return new Promise((resolve, reject) => {
        helper.checkDataArray(posts, id)
        .then(() => {
            posts = posts.filter(p => p.id != id);
            helper.writeJSONFile(filename, posts);
            resolve(posts);
        })
        .catch(err => reject(err));
    });
};

module.exports = {
    insertPost,
    getPosts,
    getPost,
    updatePost,
    deletePost
};
We import the JSON data file and the helper file. Then we set up four functions to interact with our JSON data file:
- getPosts - We return the objects data array if the array exists.
- If there are no posts, reject and return the custom message.
- If posts exist, resolve and return the posts array.
- getPost - We return the object instead of the array.
- If there is no post with this Id, reject and return an error message.
- If the post exists, resolve and return the post.
- insertPost - We insert a new row into the posts array.
- Upon success, resolve and return the post.
- updatePost - Like insertPost, we have some content from the client. We find the row via the native JavaScript function findIndex(). In this row, we add the Id, the updated date, and the content.
- If no post is found with the Id, reject and return an error message.
- If the post is found, resolve and return the updated post.
- deletePost - We delete via the native JavaScript function filter().
- If no post is found with this Id, reject and return an error message.
- If a post is found, resolve and return the updated posts array.
All these functions will return a promise and are exported at the end of the file.
Responding to Requests
When we try to retrieve our blog posts by opening http://localhost:3000/api/v1/post in our browser, it still sits there and does not finish loading.
This is because our handler functions are empty and not responding to the request yet.
When building a RESTful API, there are a few concepts we want to keep in mind when responding with data:
- HTTP status codes should describe the response
- Returned data should be formatted in JSON (preferred) or XML format
Which HTTP Method Should We Use?
When creating a REST API, each HTTP method corresponds to an action against a resource served by the API.
- GET — Retrieve a specific resource object or list all objects.
- POST — Create a new resource object.
- PATCH — Perform a partial update of a specific resource object.
- PUT — Overwrites a given resource object completely.
- DELETE — Remove a specific resource object.
We can start designing our APIs by specifying the routes for a single resource. This is derived from the uniform interface characteristic of REST APIs. We can define the routes for a single resource, then basically copy and paste them for additional resources.
To define our routes, we will use an Express Router for each resource. We create the router object, select the routes we want to respond to, and then attach the router to a specific route.
Inside the routes directory, open the index.routes.js file and add the following content to declare the path /api/v1/posts:
const express = require('express');
const router = express.Router();

// Attach the routers for their respective paths
router.use('/api/v1/posts', require('./post.routes.js'));

module.exports = router;
Then import the index.routes.js file in the index.js root file:
const express = require('express');
const app = express();
const port = 3000;

app.use(require('./routes/index.routes.js'));
Now, we can work in the post.routes.js file:
const express = require('express');
// Create the express router object for Blog Post APIs
const router = express.Router();

// Import post.model.js to interact with our resources
const post = require('../models/post.model.js');

// A GET to the root of a resource returns a list of that resource
router.get('/', async (req, res) => { });

// A POST to the root of a resource should create a new object
router.post('/', async (req, res) => { });

// We specify a param in our path for the GET of a specific object
router.get('/:id', async (req, res) => { });

// Similar to the GET on an object, to update it we can PATCH
router.patch('/:id', async (req, res) => { });

// Delete a specific object
router.delete('/:id', async (req, res) => { });

// Export the routes
module.exports = router;
Note: We are usingasyncfor handler functions since we will be dealing with promises.
So, our APIs are now ready to perform actions when we receive any of the following HTTP requests:
- GET /api/v1/post — Retrieve all blog posts.
- GET /api/v1/post/:id — Retrieve a blog post by its Id.
- POST /api/v1/post — Create a new blog post.
- PATCH /api/v1/post/:id — Update the properties of a blog post by its Id.
- DELETE /api/v1/post/:id — Delete a blog post by its Id.
If you restart the application and try to access /api/v1/post or /api/v1/post/123, you will find that the request hangs and the browser eventually times out. This is because those specific handler functions do not terminate the request yet.
Resource Lookup
When we receive a request through a particular route, we want to access the information of that resource from the JSON data file. This is so that we can return the data to the client who is executing the request.
Our code is now verbose, and we want to reduce code redundancy. This is where Express Middleware comes into play. Middleware are functions that perform specific actions based on request information but can be reused across all your routes. These functions are passed to the route after the path, and before the handler function, as follows:
req.get('/post/:id', middleware.mustBeInteger, function(req, res) { });In our case, the procedure that we will repeat often is to search for a specific resource object by its Id. Therefore, we can create a specific function that is in multiple paths.
The middleware function exactly like a route handler, but it accepts a third argument (usually called next) which is the callback function to continue to the route’s handler.
In the helpers directory, open the middleware.js file and past the content below in it:
function mustBeInteger(req, res, next) {
    const id = req.params.id;
    if (!Number.isInteger(parseInt(id))) {
        res.status(400).json({ message: 'ID must be an integer' });
    } else {
        next();
    }
}

function checkPostFields(req, res, next) {
    const { title, content, tags } = req.body;
    if (title && content && tags) {
        next();
    } else {
        res.status(400).json({ message: 'missing required fields!' });
    }
}

module.exports = {
    mustBeInteger,
    checkPostFields
};
This provides two useful middleware functions for our routes:
- mustBeInteger - Check to make sure the Id is an integer before continuing any further. We will use this when we GET, PATCH and DELETE by Id.
- checkPostFields - Check to make sure we have the appropriate data required before proceeding. We will use this when we create via POST or update via PATCH.
Note: You want to provide parameter/input validation before publishing an API to the web.
Here is a look at these middleware functions applied to our blog post paths:
const express = require('express');
const router = express.Router();

const post = require('../models/post.model.js');
const mid = require('../helpers/middlewares.js');

router.get('/', async (req, res) => { });
router.post('/', mid.checkPostFields, async (req, res) => { });
router.get('/:id', mid.mustBeInteger, async (req, res) => { });
router.patch('/:id', mid.mustBeInteger, mid.checkPostFields, async (req, res) => { });
router.delete('/:id', mid.mustBeInteger, async (req, res) => { });
module.exports = router;
Now every time a request comes through any of these paths, we can validate the request before proceeding to our handler function.
HTTP Status Codes
There are a variety of HTTP status codes, here are a few of the ones will be using:
- 200 — OK, the request was successful.
- 201 — CREATED, new resource object created successfully.
- 404 — NOT FOUND, the requested resource could not be found.
- 400 —BAD REQUEST, the request was malformed or invalid.
- 500 — INTERNAL SERVER ERROR, an unknown server error has occurred.
To return data using Express, we can use the json() method of the response object. This method accepts a JavaScript object and will automatically convert it to JSON and finish the request for us.
In the case of the route GET /api/v1/post, we should only return the data set of objects, if the array exists:
//  All posts
router.get('/', async (req, res) => {
    await post.getPosts()
    .then(posts => res.json(posts))
    .catch(err => {
        if (err.status) {
            res.statusCode = err.status;
        } else {
            res.statusCode = 500;
        }
        // We shield our clients from internal errors, but log them
        console.error(err);
        return json({ message: 'Failed to retrieve posts!' });
    });
});
In the case of the route GET /api/v1/post/:id, we check to make sure the Id parameter is an int before retrieving the object associated with the Id from the data array:
//  A post by Id
router.get('/:id', mid.mustBeInteger, async (req, res) => {
    const id = req.params.id;
    await post.getPost(id)
    .then(post => res.json(post))
    .catch(err => {
        if (err.status) {
            res.statusCode = err.status;
        } else {
            res.statusCode = 500;
        }
        // We shield our clients from internal errors, but log them
        console.error(err);
        return json({ message: 'Failed to retrieve post!' });
    });
});
In the case of the route DELETE /blog/:id, we need to process the removal of the record:
//  Delete post by Id
router.delete('/:id', mid.mustBeInteger, async (req, res) => {
    const id = req.params.id;
    await post.deletePost(id)
    .then((post) => {
        res.json({message: `The post #${id} has been deleted.`});
    })
    .catch(err => {
        if (err.status) {
            res.statusCode = err.status;
        } else {
            res.statusCode = 500;
        }
        // We shield our clients from internal errors, but log them
        console.error(err);
        return json({ message: 'Failed to delete post!' });
    });
});
How To Access POST Body?
We want our clients to be able to create records in our JSON data file. To do this, we need them to provide us with data for this resource object.
A POST body is an object of data attached to the incoming request. Express requires additional middleware to be able to process these incoming values. Enter the body-parser.
As of Express 4.16+, the body-parser middleware is part of the Express framework. We just need to import and attach it to our Express app.
Open the index.js file in the root of the project and add the import for the body-parser middleware at the top:
const express = require('express');
const app = express();
const bodyParser = require('body-parser');
const port = 3000;

app.use(bodyParser.json({ type: 'application/json' }));
Note: make sure to put it above app.use(require('./routes/index.routes.js'))!
This enables our Express application to parse incoming JSON post bodies.
We have already set up a path at POST api/v1/post to create a new resource object, now we need to write the handler code.
The body-parser middleware that was imported adds the body key to the request object. This means that we can read any property sent to use by simply doing the following:
req.body.PROPERTY_NAME // e.g req.body.descriptionNote: You always want to validate incoming data before trusting it. For sake of simplicity in this tutorial, this step has been omitted.
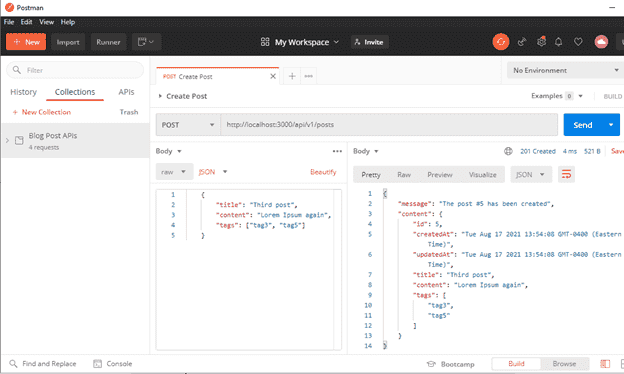
We can now simply pass the submitted user content when a request matches our blog post create route. In this case, we return status code 201 (CREATED) and the resulting resource object (which should be identical to the GET of the same resource).
//  Insert a new post
router.post('/', mid.checkPostFields, async (req, res) => {
    await post.insertPost(req.body)
    .then(post => {
        // The request created a new resource object
        // The result of CREATE should be the same as GET
        res.status(201).json({
            message: `The post #${post.id} has been created`,
            content: post
        });
    })
    .catch(err => {
    // We shield our clients from internal errors, but log them
    console.error(err);
    return res.status(500).json({ message: 'Failed to create post!'});
    });
});
The concepts we have applied for the POST route can also be applied to the PATCH route:
//  Update post by Id
router.patch('/:id', mid.mustBeInteger, mid.checkPostFields, async (req, res) => {
    const id = req.params.id;
    await post.updatePost(id, req.body)
    .then(post => res.json({
        message: `The post #${id} has been updated`,
        content: post
    }))
    .catch(err => {
        if (err.status) {
            res.statusCode = err.status;
        } else {
            res.statusCode = 500;
        }
        // We shield our clients from internal errors, but log them
        console.error(err);
        return json({ message: 'Failed to delete post!' });
    });
});
Now, how do we test this?
You could use CURL and create an HTTP request manually via the terminal but that is complicated for beginners. Postman is a very helpful tool for testing API requests.
Test Requests With Postman
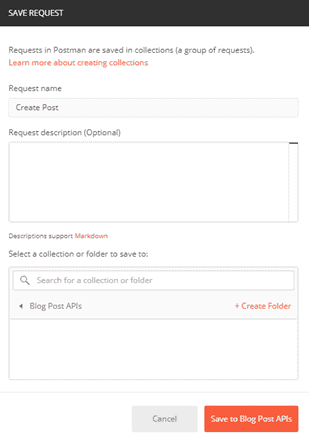
Once the Postman app is installed, launch it. You will have a screen like this screen below:
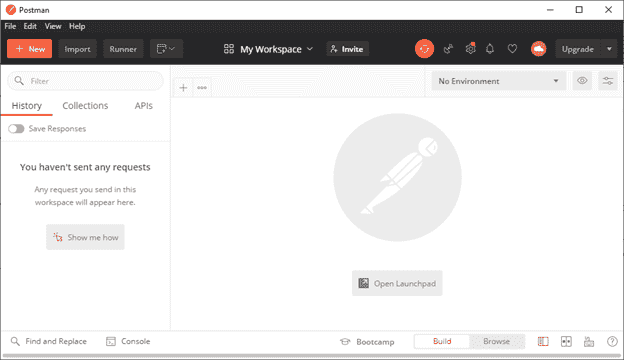
Hit the “+ New” button, select “Request”, and then enter a name for our first request (which I named Create Post). If you have not used Postman before, create a new collection to save the API test in and click the “Save” button.
You will now be dropped into the request creation screen. It has a drop down of HTTP methods/verbs, the address and a couple of different tags. The left box is for the possible request body, the right box is to display the result of the request. To run the request, you simply press the “Send” button on the right of the address bar.
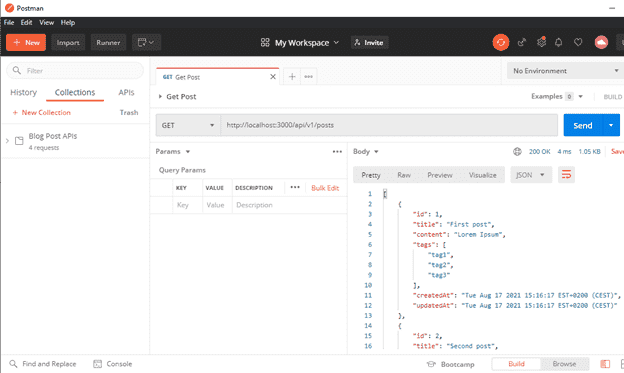
This is a great debugging tool for creating requests for different APIs (you can also save them for future use).
What About Errors?
Errors are just other forms of responses. These responses can be empty or data (depending on the type of error or API design).
Best practice for JSON REST APIs is to return an errors array in the response body.
For example, if we are responding to a bad request to create a new post, we might do something like this:
res.statusCode = 401;
return res.json({
    errors: [
        'Missing description property',
        'Missing post_id property'
    ]
});
The client will receive the 401 status code and the following JSON:
{"errors":["Missing description property","Missing post_id property"]}This allows the client to predict how the error message will appear by checking the errors key in the response and makes it easier to return more than one error message at a time.
We saw a very basic error response in our middleware example when the query could not find the row by Id.
Conclusion
So, here we are. We have created the basic functions of a REST API:
- Created routes
- Searching up resources in a JSON data file based on parameters
- Create and modify entries in a JSON data file based on request body
Although we had fun with promises, creating a RESTful API without a database is still limited. In our case if we want to add the author, how can we make this relation? This is simpler with a real database. You can switch to a database easily by modifying the model file.
For better APIs check out the Joi package to check your model schema or use this middleware to enable CORS.
The source code for this tutorial is available on Github.
If you have any questions or concerns, feel free to leave a comment below.