
Introduction
There is growing need for your website to be enabled via HTTPS (SSL). When you request a site with HTTP, not HTTPS, your connection is not secure and therefore vulnerable to malicious actions. SSL certificates allow web servers to encrypt their traffic and offer a server authentication mechanism for their visitors. By default, Google tries to move Internet activity to a secure (HTTP) network, causing HTTP sites to be marked as “Not secure”.
The main purpose of SSL is to let your visitors know that they are browsing on a secure website. You may be a freelancer, creative agency or blogger, and may not be not selling anything online. However, you may be making money offline based on the trust and authority you’ve developed online. Consider the implications of the appearance of the “NOT SECURE” label at the top of the browser when the visitor thinks about filling out a form that generates potential leads. The bottom line is you won’t see that page convert as before.
When it comes to acquiring an SSL certificate, you have two options. You can either pay for your SSL or get it for FREE. SSL certificates issued by commercial certificate authorities must be purchased. If you’re like me, you will choose the latter. As a warning, however, not everything free is easy and you’ll need to pull your sleeves up on this one.
The best free alternative are certificates issued from Let's Encrypt. Let’s Encrypt is an open Certificate Authority that issues free SSL/TLS certificates that are trusted by most web browsers.
It is important to know that not all SSL Certificates are the same. There are three levels of SSL Certs:
- Extended Validation (EV) - The SSL Cert issuer verifies the applicant’s right to use a specific domain name and conducts a thorough audit of the organization. This is the most rigorous and often seen on e-commerce or other sites collecting sensitive data.
- Organization Validation (OV) - The SSL Cert issuer verifies the applicant’s right to use a specific domain name and conducts some organization verification.
- Domain Validation (DV) - The SSL certificate issuer verifies the applicant’s right to use a specific domain name. This is the easiest option and great for small sites.
Another difference is how many domains can be secured with an SSL Certificate:
- Single-Name - Secures a single domain or sub-domain, but not sub-domains. For example, a certificate for www.mydomain.com will not secure sub.mydomain.com. This is usually the cheapest option.
- Wildcard - Secures a single domain and an unlimited number of sub-domains.
- Multi-Domain - Secures multiple domains with a single certificate.
This guide will show you how to obtain an SSL certificate for a single domain or wildcard from Let’s Encrypt but getting the other types of certificates is very similar. These steps may differ depending on who your host is. Please check this article that lists all the web hosts that currently support Let's Encrypt. If your web host is mentioned, then you are lucky, and you can follow the steps provided by them. If you only need certificates for local development, check out this article.
Prerequisites
Registered Domain Name
Before you can get an SSL certificate, you must own or control the registered domain name with which you want to use the certificate. If you do not have a registered domain name yet, you can register it with one of the many domain name registrars (i.e., Namecheap, GoDaddy, etc.).
Domain Validation Rights
For a basic domain verification process, you must have access to one of the email addresses in the WHOIS record of your domain, or to an “administrator type” email address in the domain itself. Certificate authorities that issue SSL certificates usually check domain control by sending an email confirmation to one of the addresses in the domain’s WHOIS record or to a generic administrator’s email address in the domain itself. Some certificate authorities provide alternative domain verification methods, such as DNS or HTTP based verification, which is what this guide will cover.
Web Server
In addition to the previously mentioned points, you will need a web server to install an SSL certificate. This is the server accessible by the domain name for which the SSL certificate will be issued. Typically, this will be an Apache HTTP, NGINX, HAProxy or Varnish server. If you need help setting up a web server accessible through your registered domain name, follow these steps.
- Configure the web server of your choice and be sure to configure the web server software to use your registered domain name.
- Configure your domain to use the appropriate name servers.
- Add DNS records for your web server to your name servers.
Requesting Your Free Certificate
Navigate to https://www.sslforfree.com
Enter the domain name that needs SSL enabled (e.g. test.com) into the field that says, ‘enter your website to secure’.
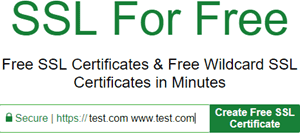
Click Create FREE SSL Certificate.
It should then take you to the next screen that simply asks you to verify that you own that domain. You have three options.
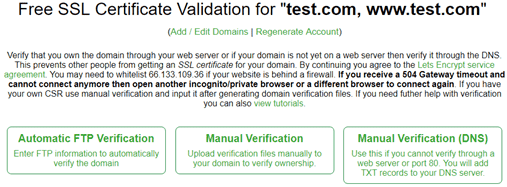
I prefer full control over where I download and upload the files. So, let’s click the Manual Verification link and it will summarize what the necessary.
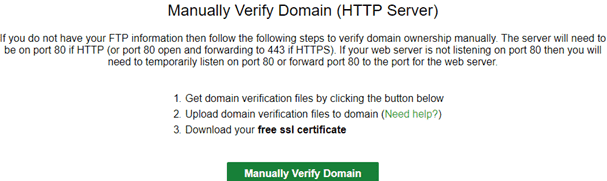
Scroll further down to the Upload Verification Files section. The steps presented to verify the domain are self-explanatory but in summary, you’ll need to:
- Establish an FTP connection to your web hosting area for this domain using a 3rd party tool such as FileZilla or use the web hosts built-in one within cPanel if available.
- Create a folder labeled .well-known within the root directly. Then inside this folder create another one named acme-challenge.
- Download the two files locally to your machine. Then re-upload them into the acme-challenge folder you’ve just created using FTP.
This is what you should have:
\server
----\.well-known
--------\acme-challenge
------------a-string
------------a-challenge
Important: Actual filenames aren’t a-string and a-challenge, both are a long alphanumeric string.
To verify that everything is fine, open up your browser and navigate to : http://yourdomain.com/.well-known/acme-challenge/a-string. Replace yourdomain.com with your domain name and a-string with the name of the file your downloaded.
Your browser should download your challenge file. If it’s not the case, take everything back from the start.
Once verified, click on Download SSL Certificate. This will download a zip file containing three files. Navigate to the directory where you’ve just downloaded the zip file and extract the files within that folder. You’ll have something like this:
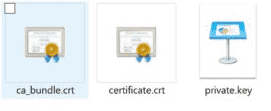
You will need to open these files separately in Notepad at a later stage, so for now, minimize this directory. When using a load balancer to complete SSL, the SSL certificate, private key, and certificate chain must be uploaded to your web host account. The following steps will depend on which web hosting you are working with. As mentioned earlier, some web hosts already provide Let’s Encrypt support, so please read their documentation, as the steps may differ. In this tutorial we will look at how to do this manually with GoDaddy and DigitalOcean web hosting.
Install Certificate on Host
GoDaddy
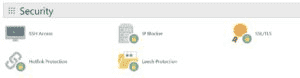
Navigate to the cPanel Admin section and in the Security section, click SSL/TLS.
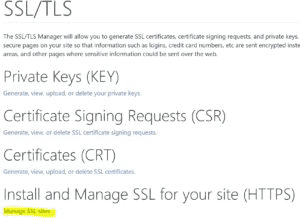
Under Install and Manage SSL for your site (HTTPS), click Manage SSL Sites.
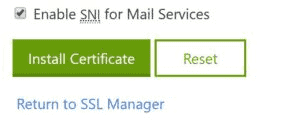
This next step is important and needs to be done accurately. After selecting the domain that needs HTTPS (SSL) enabled, open each file you download previously in Notepad to copy and paste the entire text directly into the corresponding boxes.
Note: All boxes NEED to have green ticks.
If you’re good to go then simply click on Install Certificate and it will let you know if the setup was successful or not.
DigitalOcean
In the Certificates section, you can see your existing certificates’ names and SHA1 fingerprints.
You can find the fingerprint of your certificates to compare it with the value in the control panel by running the following command on the machine where the certificate is located:
openssl x509 -noout -sha1 -fingerprint -in certificate_file.pemTo add a new certificate ahead of time, click Add Certificate. In the window that opens, select the Custom tab.
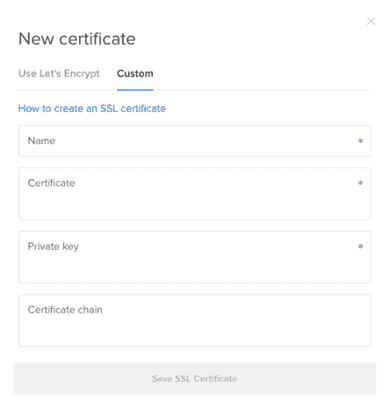
You will be prompted to choose a name and then enter the certificate, private key, and certificate chain to continue. These files must be entered in PEM format to be accepted. After you enter the information, click Save SSL Certificate.
Install Certificate on Server
After acquiring your certificate from the CA of your choice, you must install it on your web server. This involves adding a few SSL-related lines to your web server software configuration.
We will cover basic NGINX and Apache HTTP configurations on Ubuntu 14.04 in this section.
We will assume the following things:
- The private key, SSL certificate, and, if applicable, the CA's intermediate certificates are in a home directory (e.g. /home/techievor)
- The private key is called example.com.key
- The SSL certificate is called example.com.crt
- The CA intermediate certificate(s) are in a file called intermediate.crt
- If you have a firewall enabled, be sure that it allows port 443 (HTTPS)
Note: In a real environment, these files should be stored somewhere that only the user that runs the web server master process (usually root) can access. The private key should be kept secure.
NGINX
If you want to use your certificate with NGINX on Ubuntu 14.04, follow this section.
With NGINX, if your CA included an intermediate certificate, you must create a single "chained" certificate file that contains your certificate and the CA's intermediate certificates.
Change to the directory that contains your private key, certificate, and the CA intermediate certificates (in the intermediate.crt file). We will assume that they are in your home directory for the example:
cd ~Assuming your certificate file is called example.com.crt, use this command to create a combined file called example.com.chained.crt (replace the example.com part with your own domain):
cat example.com.crt intermediate.crt > example.com.chained.crtNow go to your NGINX server block configuration directory. Assuming that is located at /etc/nginx/sites-enabled, use this command to change to it:
cd /etc/nginx/sites-enabledAssuming want to add SSL to your default server block file, open the file for editing:
sudo vi defaultFind and modify the listen directive, and modify it so it looks like this:
listen 443 ssl;Then find the server_name directive, and make sure that its value matches the common name of your certificate. Also, add the ssl_certificate and ssl_certificate_key directives to specify the paths of your certificate and private key files (replace the below with the actual path of your files):
server_name example.com;
ssl_certificate /home/techievor/example.com.chained.crt;
ssl_certificate_key /home/techievor/example.com.key;
To allow only the most secure SSL protocols and ciphers, add the following lines to the file:
ssl_protocols TLSv1 TLSv1.1 TLSv1.2;
ssl_prefer_server_ciphers on;
ssl_ciphers 'EECDH+AESGCM:EDH+AESGCM:AES256+EECDH:AES256+EDH';
If you want HTTP traffic to redirect to HTTPS, you can add this additional server block at the top of the file (replace example.com with your own information):
server {
    listen 80;
    server_name example.com;
    rewrite ^/(.*) https://example.com/$1 permanent;
}
Then save and quit.
Check your configuration for syntax errors:
sudo nginx -tNow reload NGINX to load the new configuration and enable TLS/SSL over HTTPS!
sudo service nginx restartApache
If want to use your certificate with Apache on Ubuntu 14.04, follow this section.
Make a backup of your configuration file by copying it. Assuming your server is running on the default virtual host configuration file (/etc/apache2/sites-available/000-default.conf), use these commands to to make a copy:
cd /etc/apache2/sites-available
cp 000-default.conf 000-default.conf.orig
Then open the file for editing:
sudo vi 000-default.conf Find the <VirtualHost *:80> entry and modify it so your web server will listen on port 443:
<VirtualHost *:443> Then add the ServerName directive if it doesn't already exist (substitute your domain name here):
ServerName example.com Now add the following lines to specify your certificate and key paths (substitute your actual paths here):
SSLEngine on
SSLCertificateFile /home/techievor/example.com.crt
SSLCertificateKeyFile /home/techievor/example.com.key
If you are using Apache 2.4.8 or greater, specify the CA intermediate bundle by adding this line (substitute the path):
SSLCACertificateFile /home/techievor/intermediate.crt If you are using an older version of Apache, specify the CA intermediate bundle with this line (substitute the path):
SSLCertificateChainFile /home/techievor/intermediate.crt At this point, your server is configured to listen on HTTPS only (port 443), so requests to HTTP (port 80) will not be served. To redirect HTTP requests to HTTPS, add the following to the top of the file (substitute the name in both places):
<VirtualHost *:80>
  ServerName example.com
  Redirect permanent / https://example.com/
</VirtualHost>
Then save and exit.
Now enable the Apache SSL module by running this command:
sudo a2enmod ssl Finally, restart Apache to load the new configuration and enable TLS/SSL over HTTPS!
sudo service apache2 restartConclusion
Give it a few minutes and try out your new SSL encrypted domain by typing in https in front of it (e.g. https://www.techievor.com). You will also want to try connecting via HTTP (e.g. http://techievor.com) to ensure that the redirect is working properly!
There you have it! Now you should have a good idea of how to add a trusted SSL certificate to secure your web server. Good luck with getting your site secured. If you found this useful, then please share this as I believe no one should be paying for SSL.
Additional Reading